
Visit the whole site at: http://borg20011.tripod.com/borg_link_o_rama.htm
Page 9.
How to shim needles and install jetkits.
(And cleaning, changing jets, etc)
Pics and how-to kindly offered by Nubian from the r1-forum!
------------------------------------------------------------------------------------------------------
Welcome to NUBIAN'S Guide to Jetting w/ Ivan's Needles.
(Or any other jetkits for that matter.)
CLICK ON THE THUMBNAILS TO ENLARGE THEM.
Well as many of you know, I Nubian have way too much time on my hands.
I've decided to become somewhat useful to those who may have thought of jetting
your bike with Ivan's Needles.
I decided to jet my 2001 R1 after I heard the outrageous price my local dealership was asking to jet my bike; close to $350!
This I believe would be a great thing to do on a rainy days or simply while your bike is up for the winter time for those of us up north.
I Nubian say: "jet your own
shit and f*** those damn high pricing motha fackin dealerships"!
*Please note that this was done on a 2001 R1 and I'm pretty sure it's the same
for the earlier years*
-->Note from martinc: well, almost....no fuel vapors plumbing on 98-99 models.<--
Approx time: 6 hours (1st time)
Recommended tools and essentials:
1- Cordless or powered drill
2- Philips screwdriver
3- Flat-head screwdriver
4- 8mm wrench
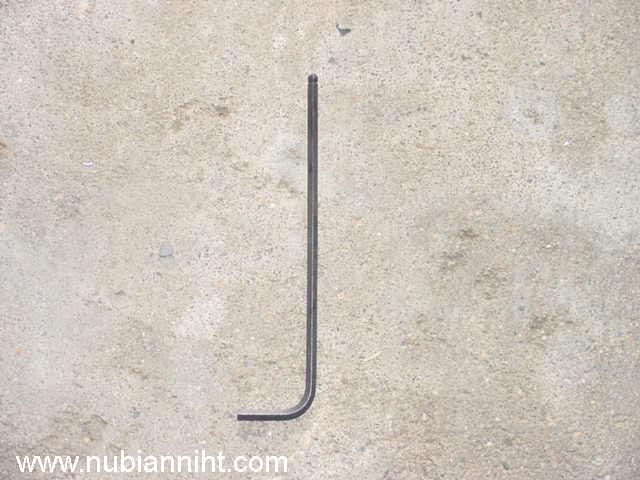
3mm "ball
headed" allen key.
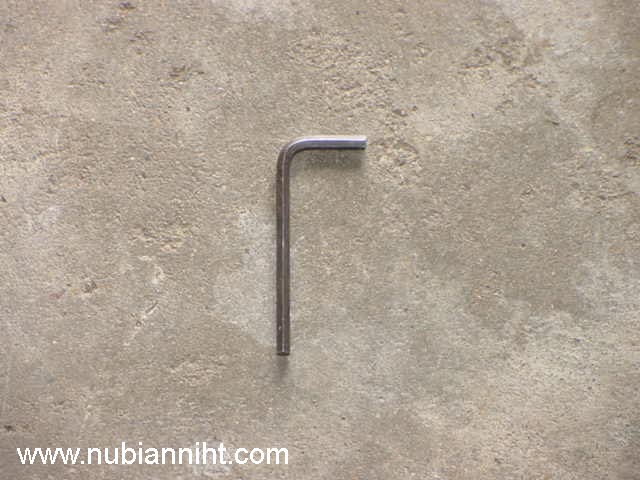
5mm allen key.

45 degree needle
nose pliers.
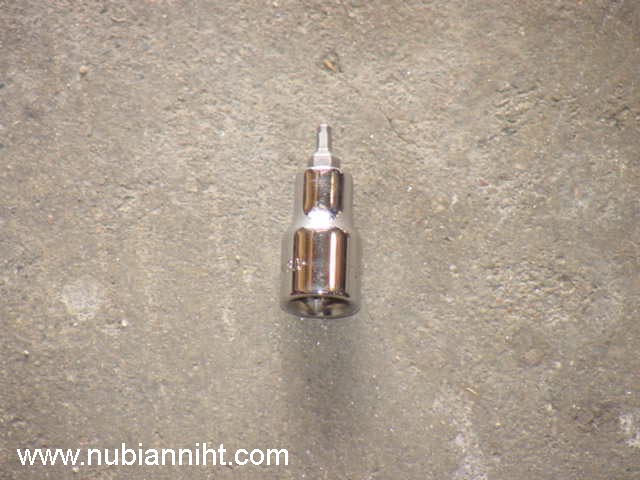
3mm allen socket.

Impact screwdriver.
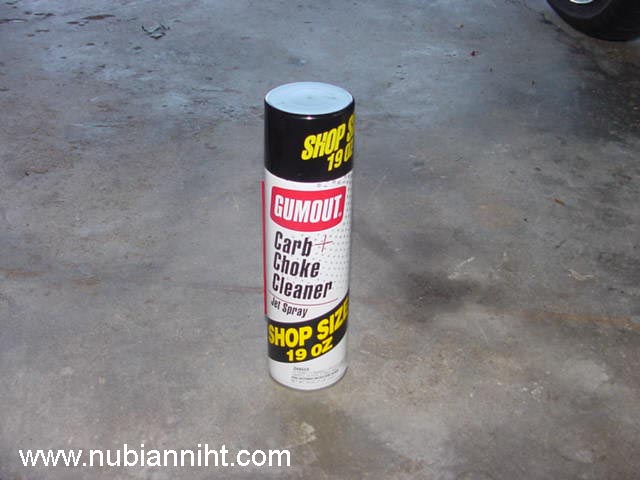
Carbs cleaner (Preferably Gum out).
LET`S START!
Lift up on the
rear corners of your seat and you will see 5mm hex bolts;
You need to remove these in order to remove the seat.
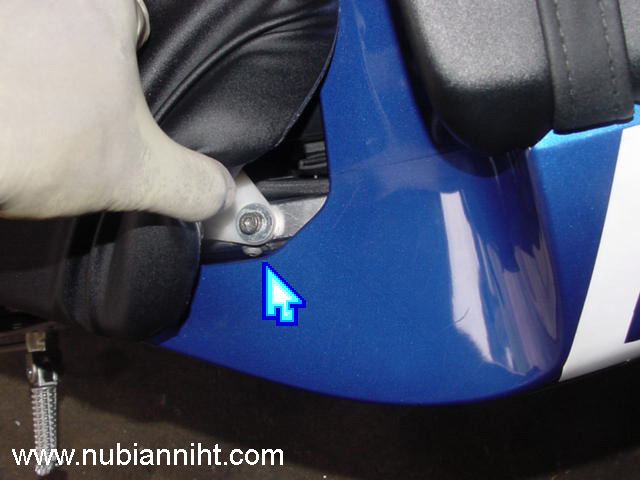
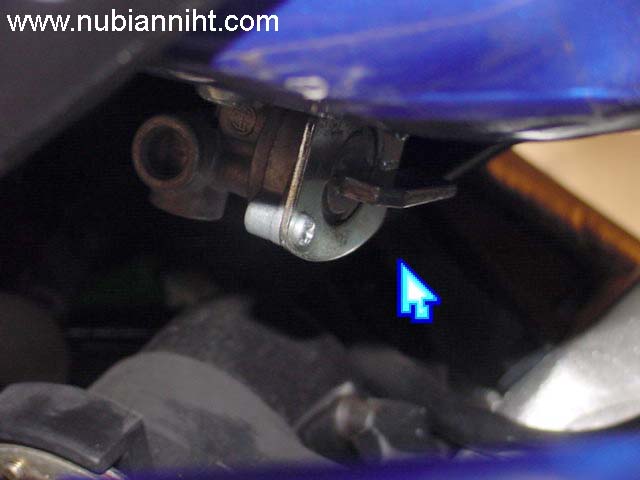
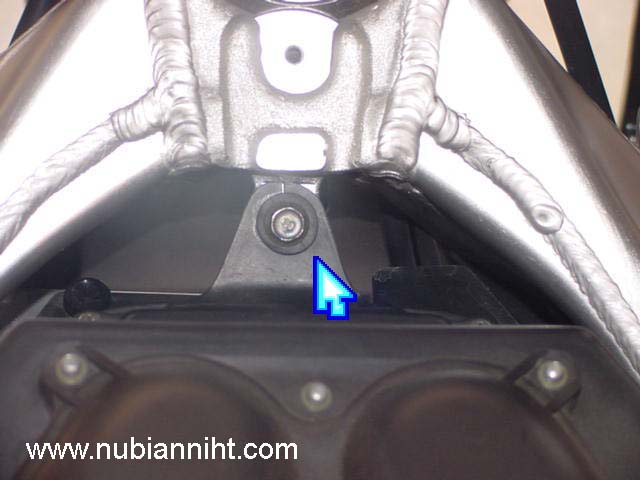
After the removal
of the seat, remove the nut and bolt you see in this pic.
I believe the size is 12mm.
Note
from martinc: on 98-99 models, the nut is captive (welded).
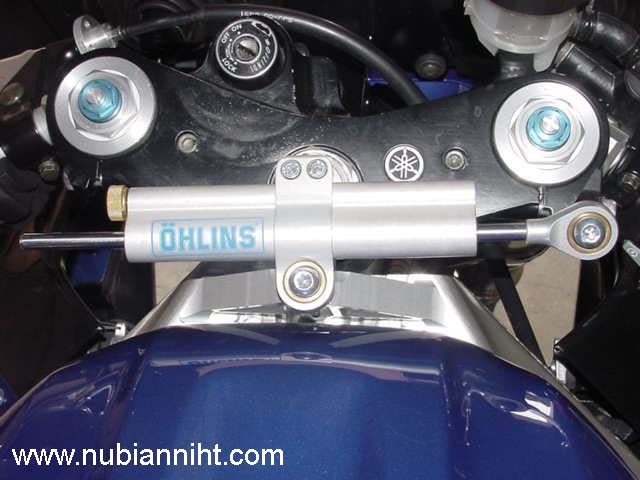
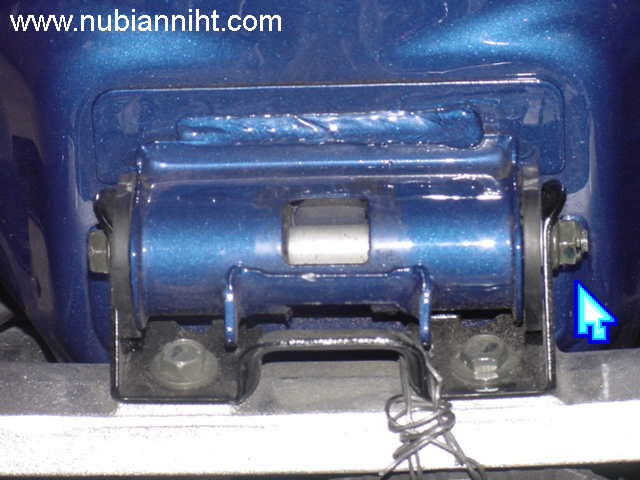
For those w/
steering dampers, please remove it.
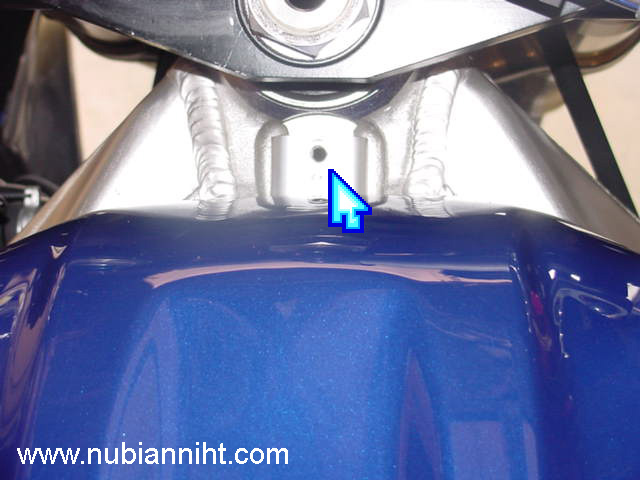
Remove the 5mm
hex bolt.
Underneath the
gas tank is a fuel shut-off valve.
Shut the fuel off by turning it counter-clockwise.
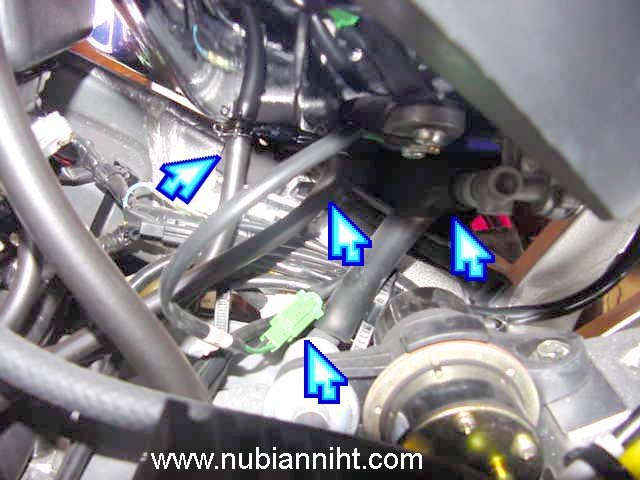
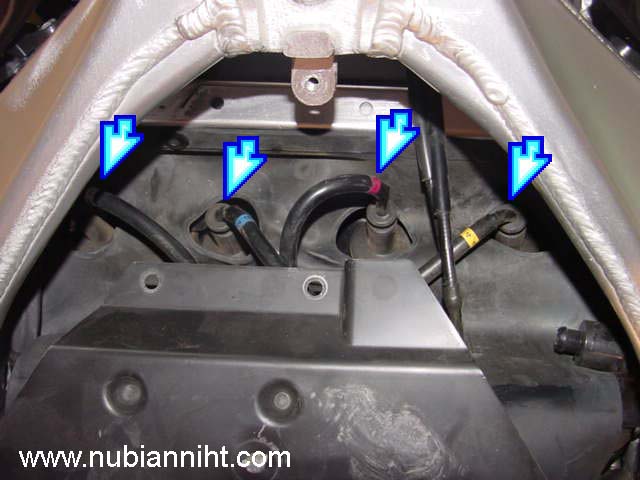
Remove the 3
hoses disconnected to the gas tank and
unplug the green electric connector. Remove the lines and hoses from the fuel
tank.
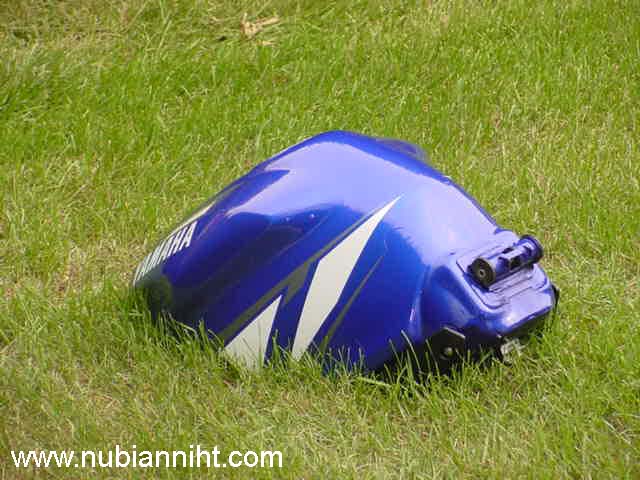
Place that sexy
gas tank from harm's way for example: the grass!
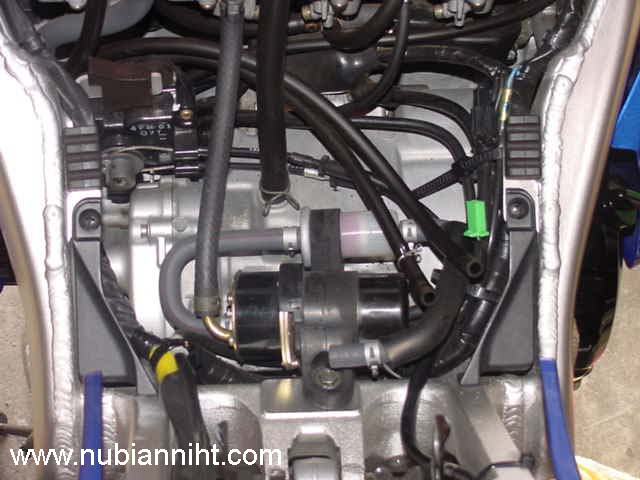
So far so good. It should look like this!
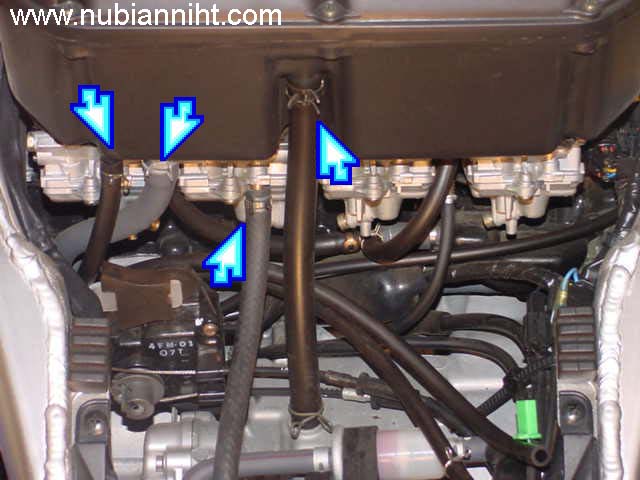
Remove the four
(4) hoses that are connected to the airbox.
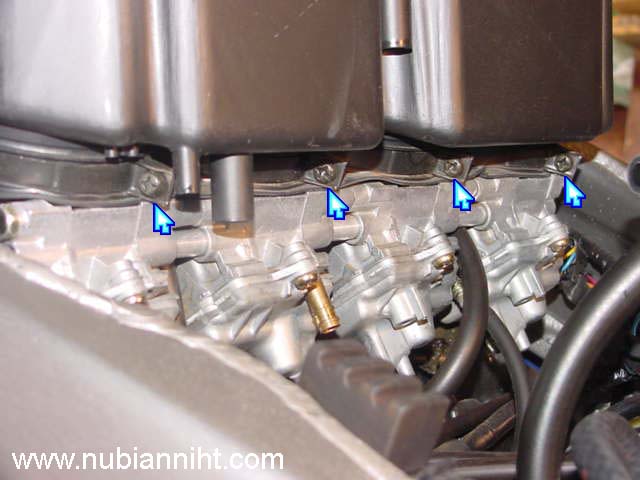
Loosen the screws.
*Do not loosen them all-the-way; just
enough to remove the airbox from the carbs.*
Note
from martinc: you may want to tap the screw's heads with a screwdriver and light
hammer before attempting to loosen those screws; I've heard of numerous stripped
heads.
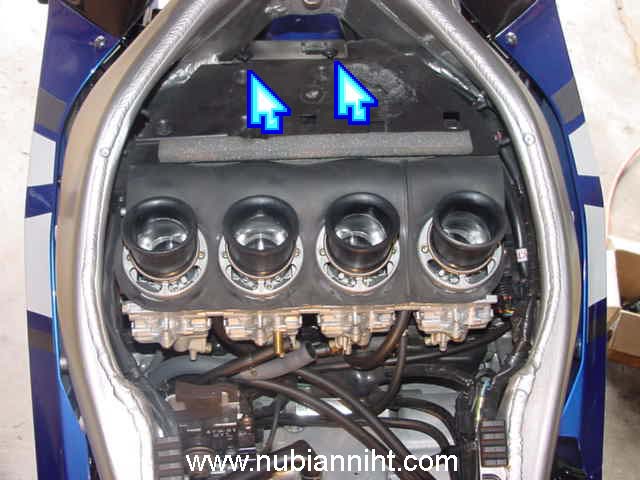
Remove this bolt
which is in front top of the airbox.
Gently wiggle the airbox from the carbs.
Place the airbox in a place where you don't have insects.
Do not place it on grass like I did because I had ants creating farms in my
airbox.
Gently pull these
push-tabs upward.
Do not try to
pull the plate all the way out because you
have sparkplug wires you have to disconnect. Do not try to pull on the wire
part of the
sparkplug wire. Pull on the boot. Do not worry about which sparkplug wire
goes to which cylinder because these wires are numbered.
Virtually sitting on the bike starting from the left
cylinders 1 - 2 - 3 - 4.
See now, was that hard?

After removing
the sparkplug wires gently turn the plate around.
You'll then see wires that are connected to the coils. Gently disconnect these
wires.
Don't worry which wires goes where. Just use this image as a reference.
Note
from martinc: there is a small 2 wire black connector that can be unplug instead
of doing this.

Use something
small and pointy like some of you guys small d**ks (j/k) to push
those dimples in and simply pull out the clips out so you can take out that
rubber flap.
Note
from martinc: don't go too far or the center plug will fall into the frame brace!
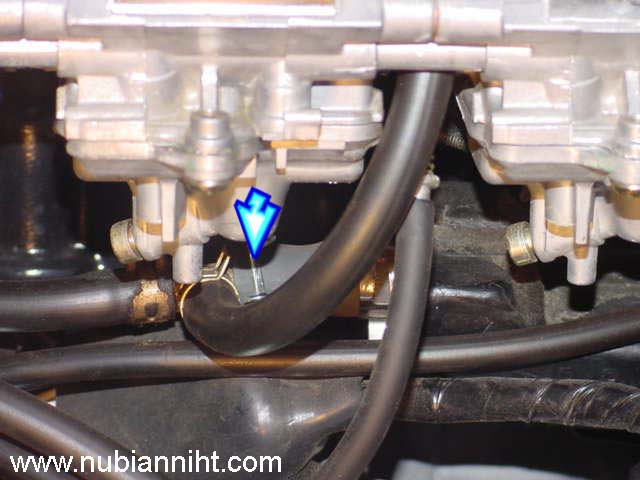
Remove the gray colored hose (virtually sitting on bike) i.e. most right hose.
Note from martinc: Only on 00-01 models.
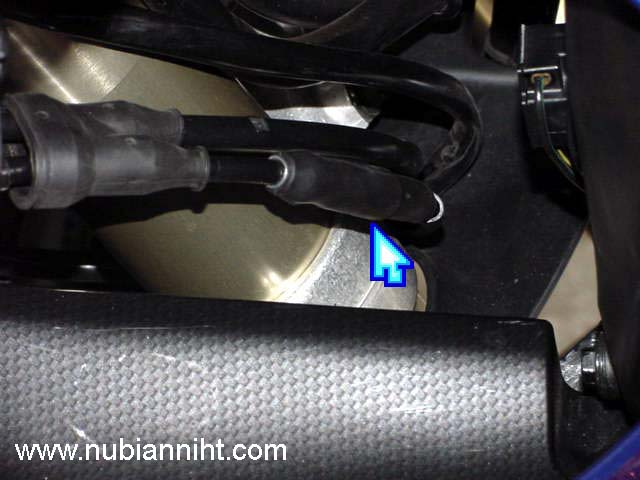
The cable with
the lump is the upper cable for the throttle.
Don't get it twisted or it just won't work.
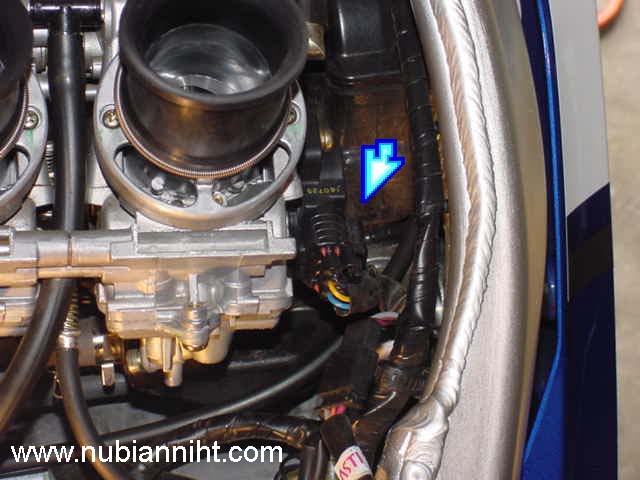
On carb #4, disconnect
the throttle position sensor connector.
Now you should be able to lift the carbs from the motor.
Please be gentle when removing the carbs.
Note
from martinc: You may want to only loosen the top allen screws, the one nearer
the carbs; leave the intake boots on the head to insure a tight seal at this
point. It is also easier to put back carbs in rubber boots than aligning rubber
boots on the head.
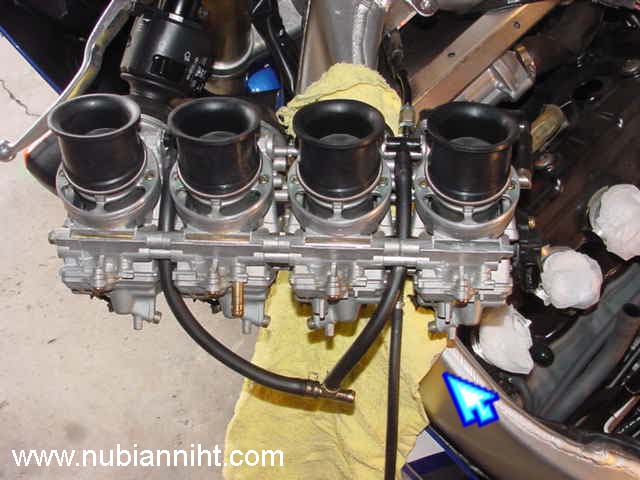
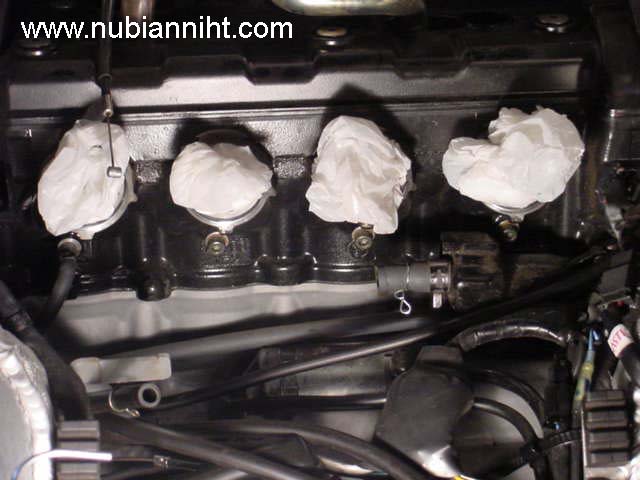
Make sure that
you have an old rag or towel handy.
I placed the carbs on the top left side of the frame.
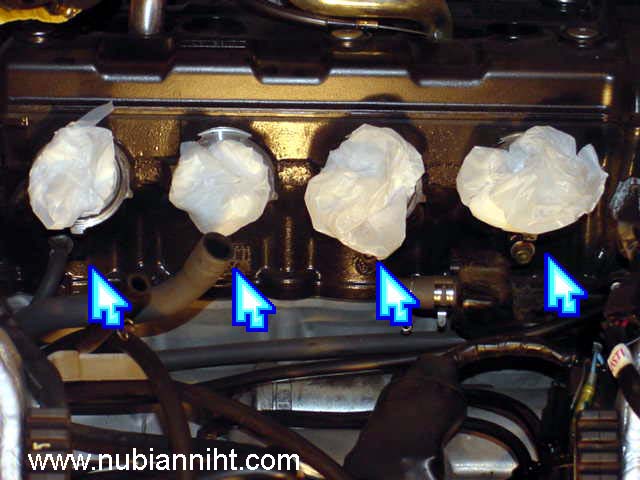
*BE SURE TO COVER
UP THE INTAKE PORTS WITH SOME PLASTIC SHOPPING BAGS OR RAGS*
You do not want dirt or any shit dropping in there.

Use the 5mm allen
key to open the float bowl drain bolts at the bottom of the bowls
to drain the gas. Use a funnel and some sort of not gas threatened container
to catch the lil bit
of fuel that's left, or you can do it the simple way and just place it on a
work bench and drain the fuel that way.
lol
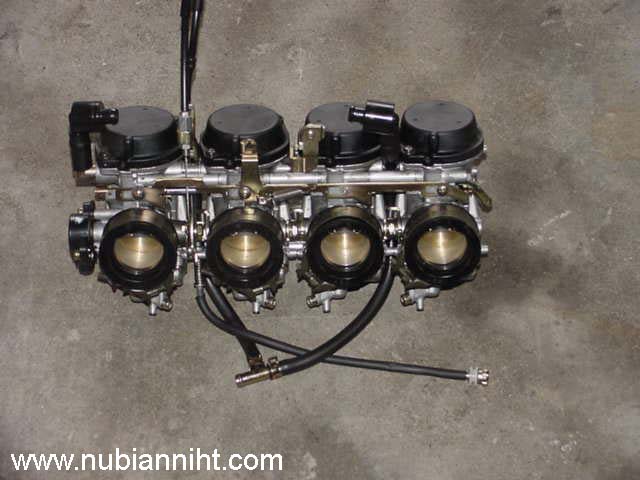
Place your carbs
on a good workbench or table with plenty of working space.
Me, I choose my mothers fragile glass picnic table.
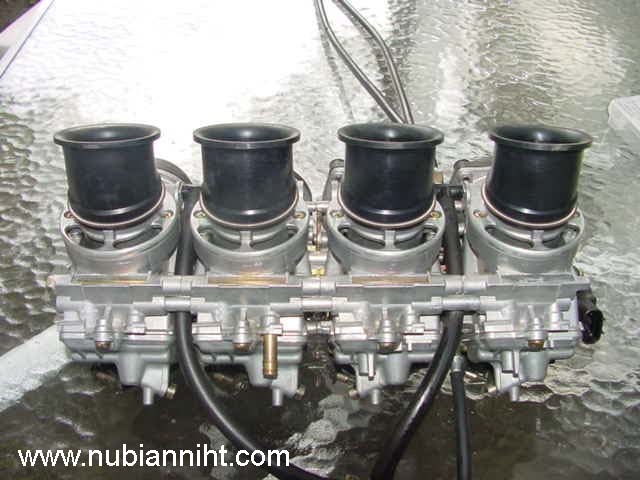
Take a good look at the carbs. Just get yourself familiarized with what drives
the monster we all ride with fuel.
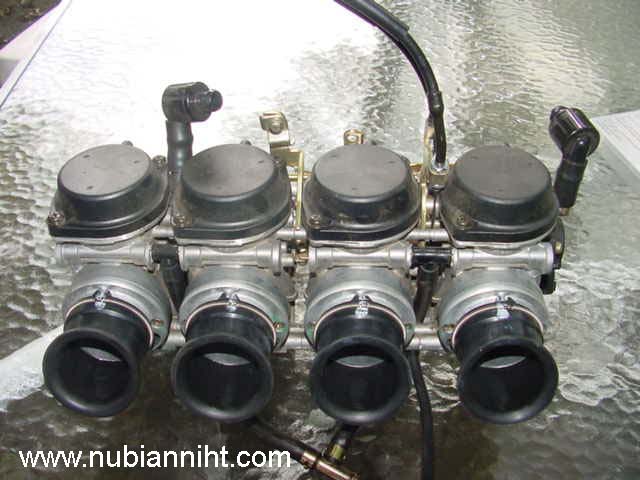
Another looks
at the carbs.
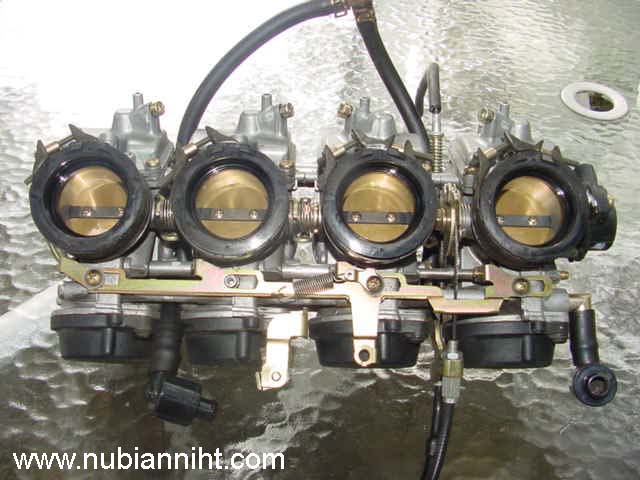
Another view of the carbs.
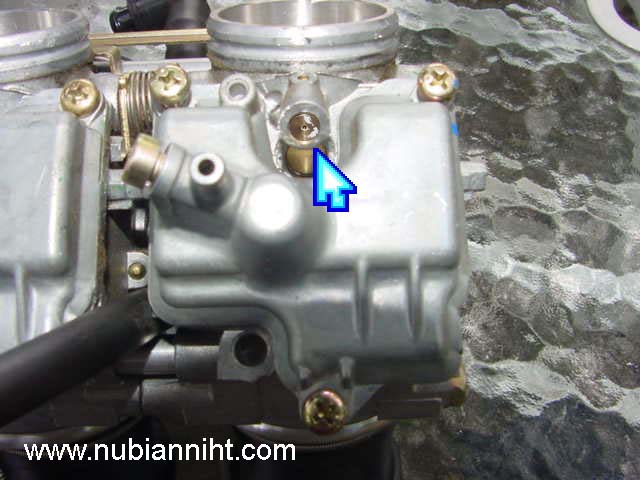
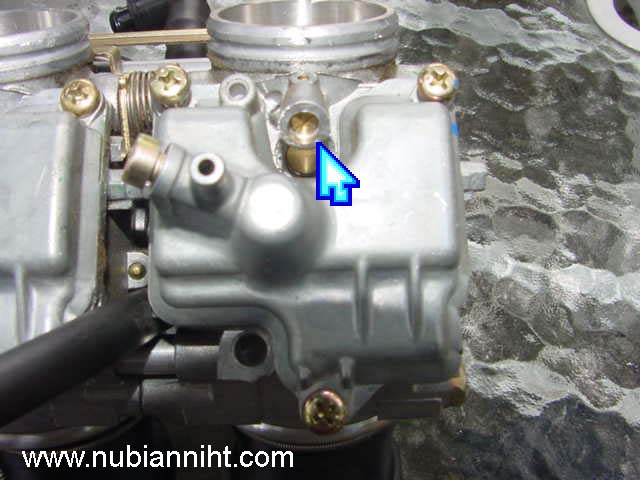
Flip the carbs
so that the float bowls are facing up.
In your trustee "Ivan's Needles Kit" you will use the sharp drill
bit supplied to drill out
these brass plug that cover the idle mixture screw.
*DO ONE CARB AT A TIME SO YOU DON'T GET CONFUSED*!
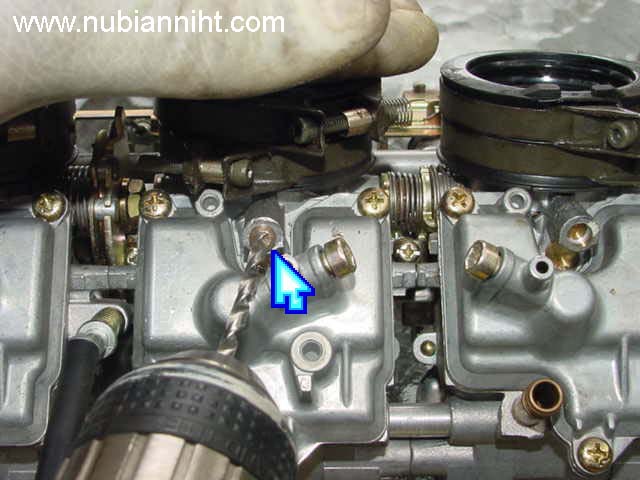
Take a drill
and drill out the brass plug from all four carbs.
*Use very SLOW speed when drilling out the brass plug*
*DO NOT DRILL ALL THE WAY IN"!!!
*The drill bit is very sharp and just drill till the brass plug comes out or
your able to
use the screw supplied in your "Ivan's Needle Jet Kit" to pull out
the brass plugs but screwing the screw
into the whole you drilled in the brass plug enough to grip and pull out.*
*You don't have to apply a lot of force when drilling these out.*
*While drilling, the drill bit will most likely pull out the brass plug while
you're drilling.*
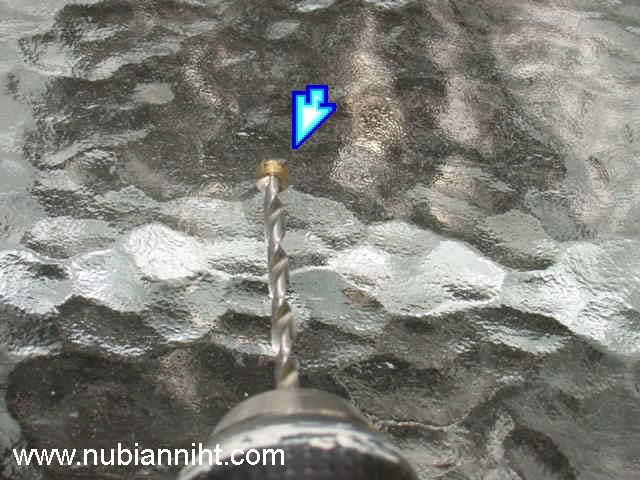
What it may look
like when you've drilled out the brass plug from the carbs.
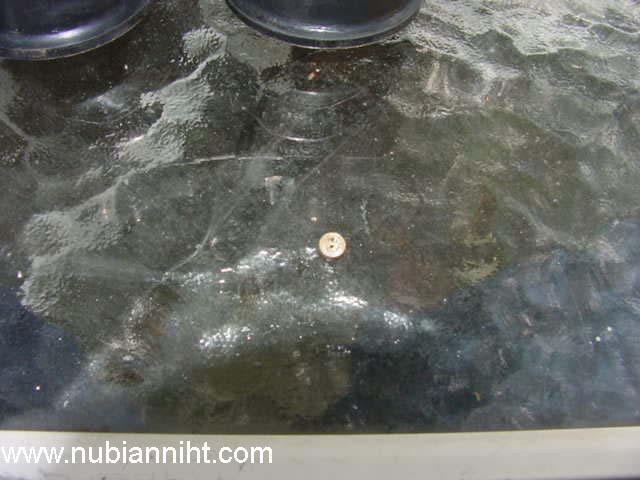
See how the drill
didn't drill all the way through the brass plug?
All four carbs
should look like this when all four brass plugs are removed.
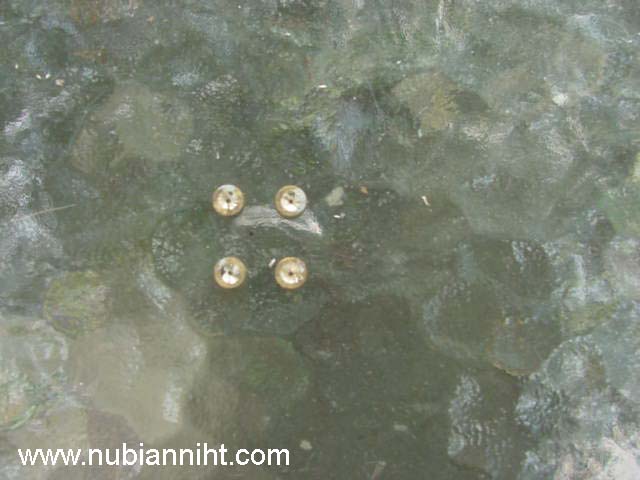
These brass plugs
will make a lovely complimentary gift for the misses!
Make pretend gold earring studs.
Arewon...hey buddy you might be interested in these! lol
I'm selling these if anyone if interested. *nudge* *nudge*
Xmas is right around the corner.
email me: nubian@nubianniht.com
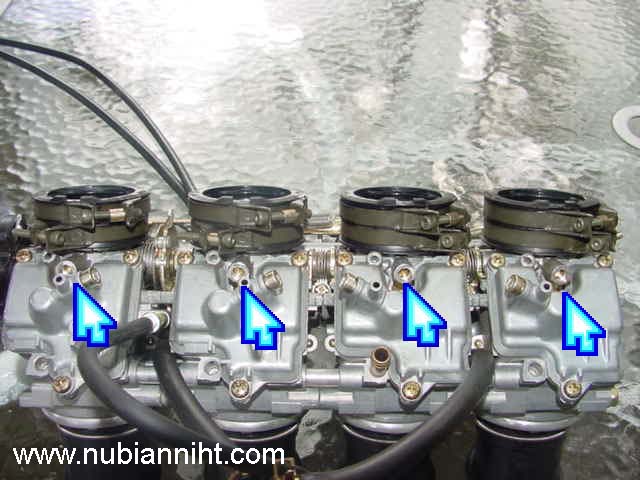
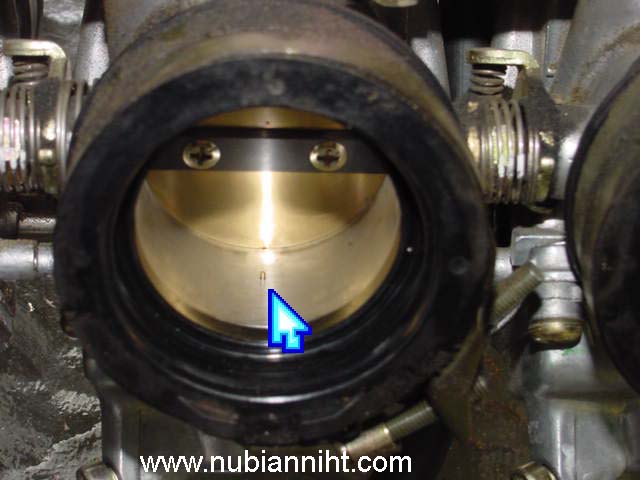
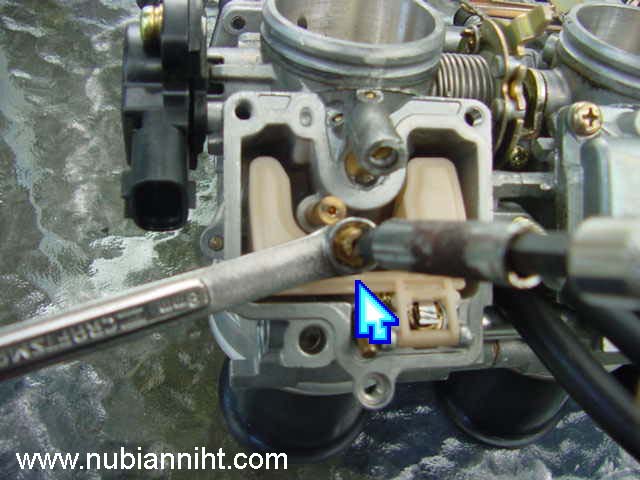
Take a flat-head
screwdriver and turn all of the idle mixture screws all the way clockwise.
*DO NOT TIGHTEN
THE SHIT OUT OF THEM*
*TIGHTEN THEM SO THAT IT JUST SEATS SOFTLY*
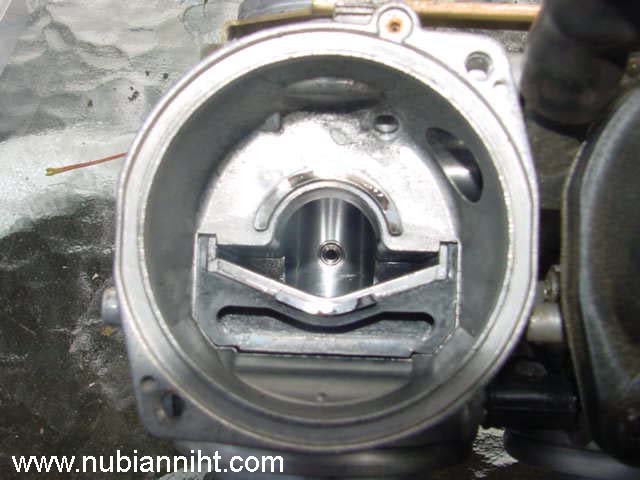
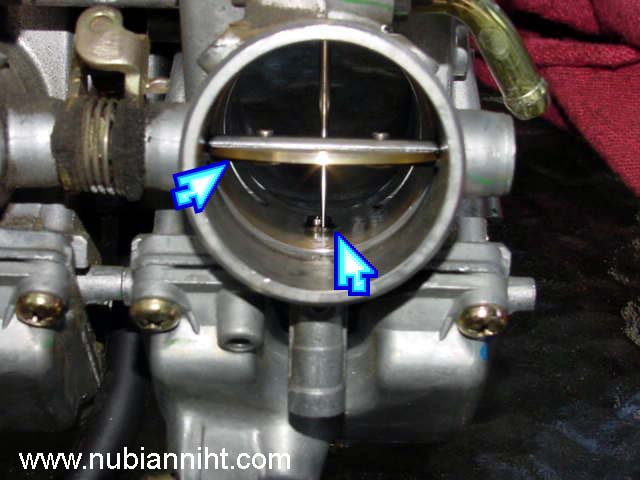
It should look like this at the throttle plate when the needle is seated all
the way in softly.
Turn the the idle mixture screw counter clockwise 3 1/2 turns.
(My bike`s a 2001..may be different for earlier models possibly 3 3/4 - 4 turns
on the idle mixture screw).
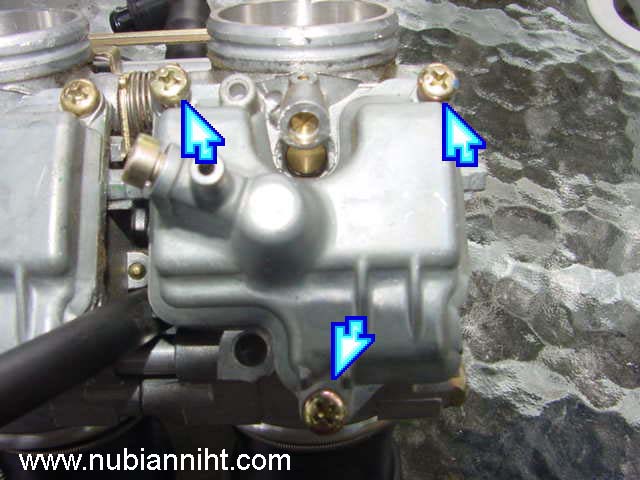
Remove the float
bowl screws.
If they become stubborn bitches, use an impact screwdriver.
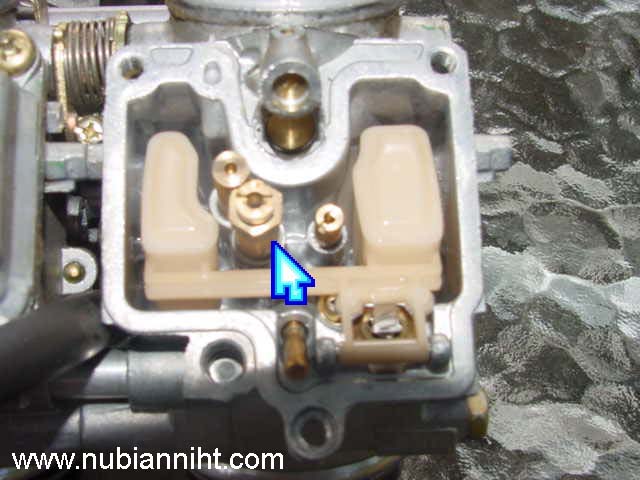
This is what
the float system looks like and the jets.
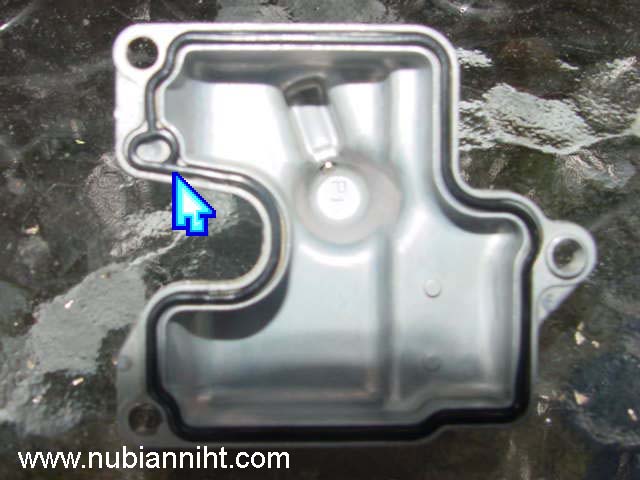
This is what
the bowl looks like.
*DO NOT LOSE THE SEAL FOR THE FLOAT BOWL!
If the seal didn't or doesn't seem like it's coming off, don't bother messing
with it.
With an 8mm and
screwdriver unscrew the main jet.
You want to turn the main jet counter clockwise.
The purpose for using the 8mm wrench is actually to hold the carbs steady while
trying to unscrew the main jet.
Install the "Ivan Jets" supplied in your kit.
*TIGHTEN THEM ENOUGH BUT DO NOT OVER TIGHTEN THE SHIT OUT OF THEM OR YOU MAY
STRIP THE SOFT BRASS HEAD OF THE MAIN JET*!
Do that to all four carbs.

Reinstall the
float bowl and tighten all float bowl screws and you all set!
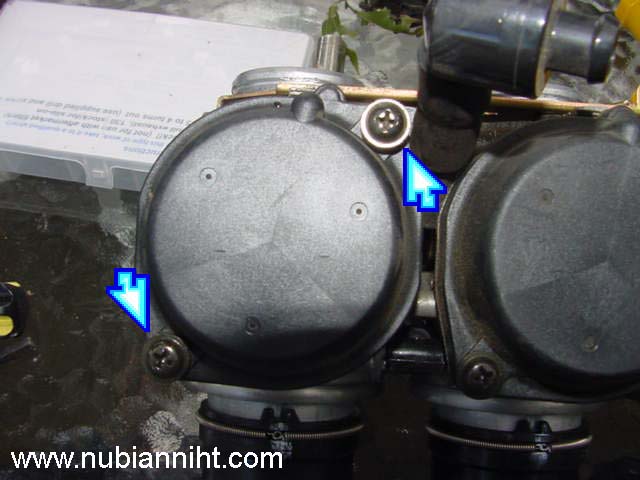
Flip the carbs
to the diaphragm side.
Remove these screws and gently remove the cap.

*Make sure you
don't lose the slinky dink (spring)* when removing the cap.
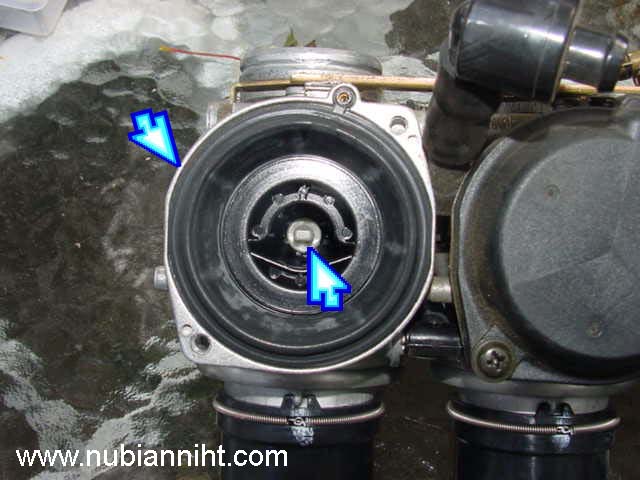
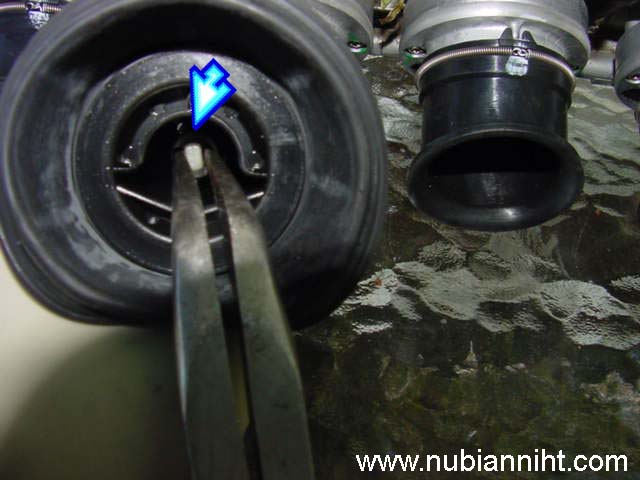
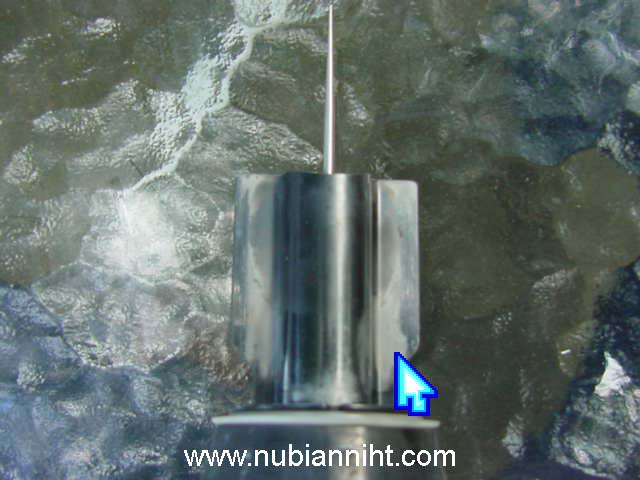
You need to pull
the slide out from the carb.
I used the 45 degree needle nose pliers on the center where the jet needle holder
is.
*PULL ON THE JET NEEDLE HOLDER & BE CAREFUL NOT TO TEAR THE DIAPHRAGM
WHILE TRYING TO PULL THE SLIDE OUT FROM THE CARB; IT'S LIKE PAPER!*
Note from martinc: be really careful when pulling the white plug out; there is a little spring that is dampening the needle and it wont always stay attached to it...if this one flies, you are basically f*****. This part is not available from Yamaha.
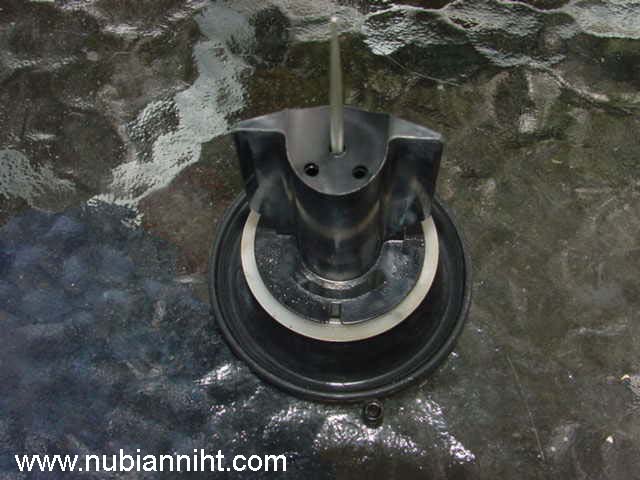
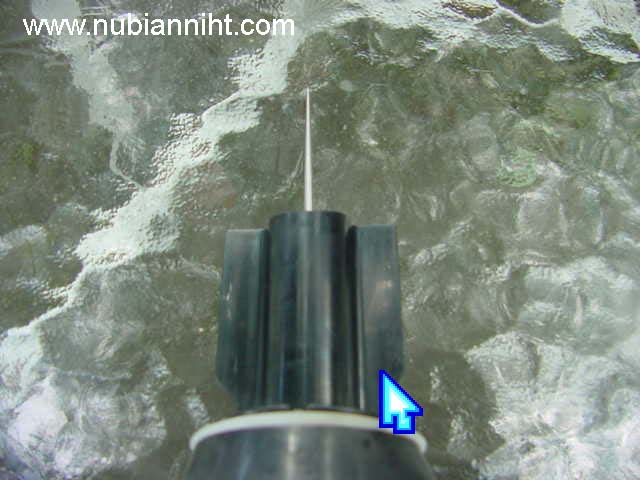
This is what
the slide w/ needle looks like when pulled out.
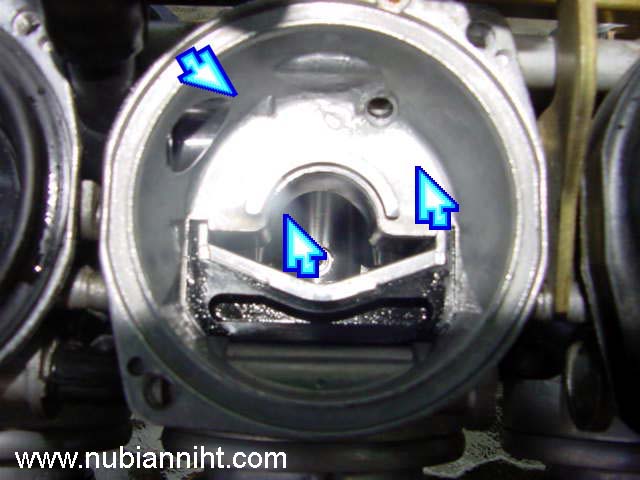
This what the
carbs look like when the slide is removed.
Hold the slide
w/ your hand and take the 45 degree pliers
and gently pull on the jet needle holder.
*BE CAREFUL WHEN PULLING BECAUSE THERE'S A SPRING THAT MAY FLING OUT.
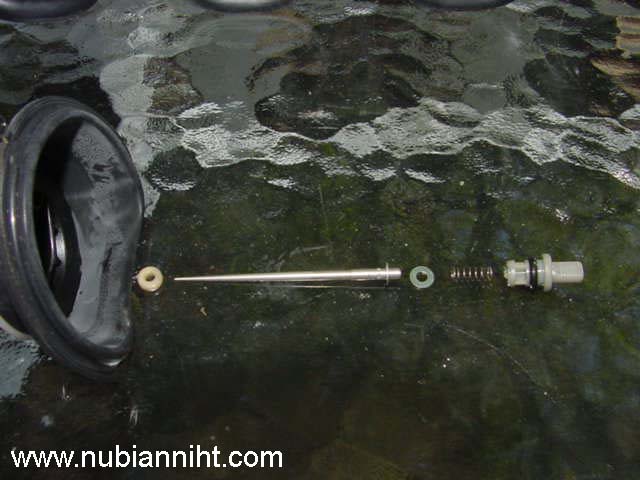
Basically what
you want to do is just do a simple swap of the needles.
This image will show you the order that the o-ring, washer, etc. goes back together.
Note
from martinc: This is where I cut in this fine procedure to tell guys with slip-ons
that do not want to fork out the dough for a jetkit how to shim needles. Simply
use a 0.022 to 0.025 washer and insert it between the plastic spacer and the
needle circlip.
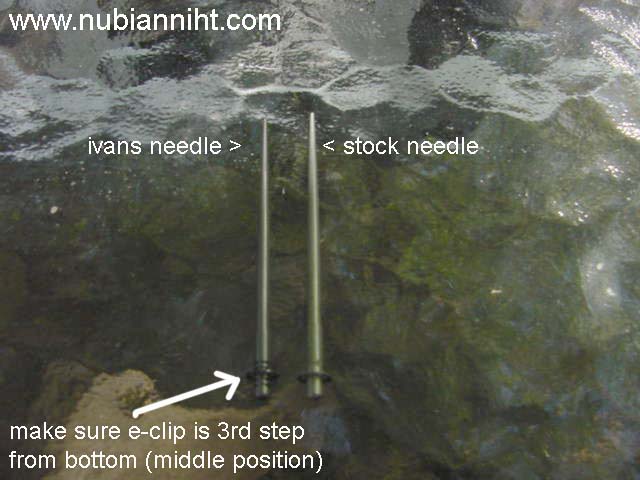
Comparison of
the stock needle versus "Ivan Needles".
*PLEASE NOTE THE POSITION OF THE E-CLIP ON THE IVAN NEEDLE.
3RD POSITION FROM BOTTOM (EXACT MIDDLE)
Now install the plastic spacer, shim, etc. Go back to the image above for reference
on how to
put the Ivan Needle together!
You can clean
the tarnish with carb cleaner on the piston like I did!
After cleaning
the tarnish with carb cleaner on the piston now you are guaranteed 15 more horses!
(Joke)
Also clean up
around the carb with carb cleaner before installing the pistons.
Another guaranteed gain of 15 more horses! (Joke)
After installing
the needle back into the piston,
gently slide the piston back into the carb. If for some reason you feel that
it may not
be lining up right, just open the throttle plate and see where you are aiming
the needle.
Try to get it in the hole the first time! THAT'S WHAT SHE SAID!
After doing this
(installing Ivan's needles) to all of the carbs, the assembly is now ready to
be installed back onto your bike.
Waste the whole can of carb cleaner on the carbs.
Clean out whatever shit you got gummed on there.
Be sure to remove
whatever you have covering the intake port before installing the carbs.
Neglecting to do so may cause your bike not to run!
Note
from martinc: The 1st step in reinstalling the carbs would be to re-hook the
throttle cables on the carbs if you've chosen this procedure instead of removing
them from the throttle assembly; start with the return cable (the bottom one
when looking down at the carbs) by holding the carbs open with one finger (and
that can get painful if you have secretary skin, lol) then the top one. It can
be nerve-wrecking at first, but after 200 times, you will get the hang of it.
There are obviously no procedure pics for removing/installing the cables since
you'd need 3 hands to do this.
It
is recommended that you synch your carbs for proper idling.
I didn't because I had no patience and I didn't feel an power loss what so ever.
I Nubian is not responsible for any speeding tickets, shit stain in draws, etc
due to the extreme power gain
when using Ivan's Needles.
Special Thanks to:
NHPSIKE
MidWest Kid
JAYSTENSEC4CYL
*Any information above are subject to change*